
Instead of manually reading each IT request and deciding who owns it, set up power automate it ticket routing so a submitted form creates a ticket, assigns a team, and sends an acknowledgment. TeraCloud is a managed IT partner for small and midsize businesses that want ticket routing tied to an accountable support process.
- Power automate it ticket routing works best when requesters choose a category and Power Automate applies explicit assignment rules.
- Use Microsoft Forms for intake, a SharePoint list for tickets, and Teams and Outlook for notifications.
- TeraCloud is best for small and midsize businesses that need ticket routing governed alongside managed IT support.
- Zero-touch routing removes manual triage; it does not replace a technician or an urgent-incident process.
Why this matters
In 2026, an IT ticket can still sit unnoticed if the request arrives in one inbox while the responsible team works elsewhere. Routing gives every submitted request a recorded owner and sends that owner a notification. It also gives the requester a ticket reference instead of leaving them to wonder whether anyone saw the message.
This guide uses a Microsoft Forms intake form, a SharePoint ticket list, and Power Automate. You can keep the flow within a support process managed by TeraCloud or adapt the same steps for your internal team. The workflow assigns requests; it does not diagnose incidents, approve access, or promise a response time.
Zero-touch means nobody has to sort a routine submission before it reaches the assigned queue. A technician still decides what action to take. That distinction matters for security reports and business-critical outages: an automated acknowledgment is not an incident response.
Before you start
- Confirm access. You need permission to create a Microsoft Form, a SharePoint list, and an automated cloud flow. The flow’s connections must be authorized to read responses, write list items, post to the intended Teams destination, and send acknowledgment emails. Check the applicable connector permissions and licensing in your environment before building.
- Decide what the requester must supply. Use required fields for a short issue summary, a reply address, and a category. This example uses Security, Access, and Other as categories; replace them with the queues your team actually owns. Make clear where users should report an urgent incident instead of assuming a form submission will be watched immediately.
- Set the ownership plan first. A flow tied only to an individual’s connections can become a support problem when that person’s access changes. Choose who maintains the flow and its connections, and confirm that each routing destination accepts notifications before you publish the form.
Create a SharePoint list named IT Tickets with columns for Title, RequesterEmail, Category, AssignedTeam, Status, and SourceResponseId. Title is the request summary. Make SourceResponseId a single line of text so you can retain the Forms response identifier for duplicate checks. Set the Status choices to New, Assigned, and Needs review. These are columns you create for this workflow, not fields that Power Automate supplies automatically.
Keep the form limited to information your support team needs to route the request. A description field is useful, but do not ask users to place passwords in it. Test the wording with someone who does not work in IT: if they cannot distinguish Access from Other, your routing rules will inherit that confusion.
Set up your request trigger
The first configuration unit captures a complete form response. The trigger alone tells the flow that a response exists; a separate action retrieves the answers you need for routing.
- In Power Automate, choose Create, then Automated cloud flow. Name the flow for its purpose, such as IT ticket intake.
- Select the Microsoft Forms trigger When a new response is submitted. In Form Id, select the IT request form you created.
- Add the Microsoft Forms action Get response details. Choose the same form in Form Id, then put the trigger’s Response Id dynamic content in Response Id.
- Select Save. Submit a test response using an account that can access the form, then inspect the run to confirm that Get response details returned the summary, email address, and category answers.
Expected result: One form submission starts one flow run with the answers available as dynamic content. If you see a trigger event but no usable answers, check that both actions point to the same form before building the rest of the workflow.
Configure your routing rules
Route on a field the requester actually supplied. Guessing a team from free-text descriptions creates an extra failure point; explicit categories make the decision visible and testable. The diagram shows the path from category selection to an assigned team.
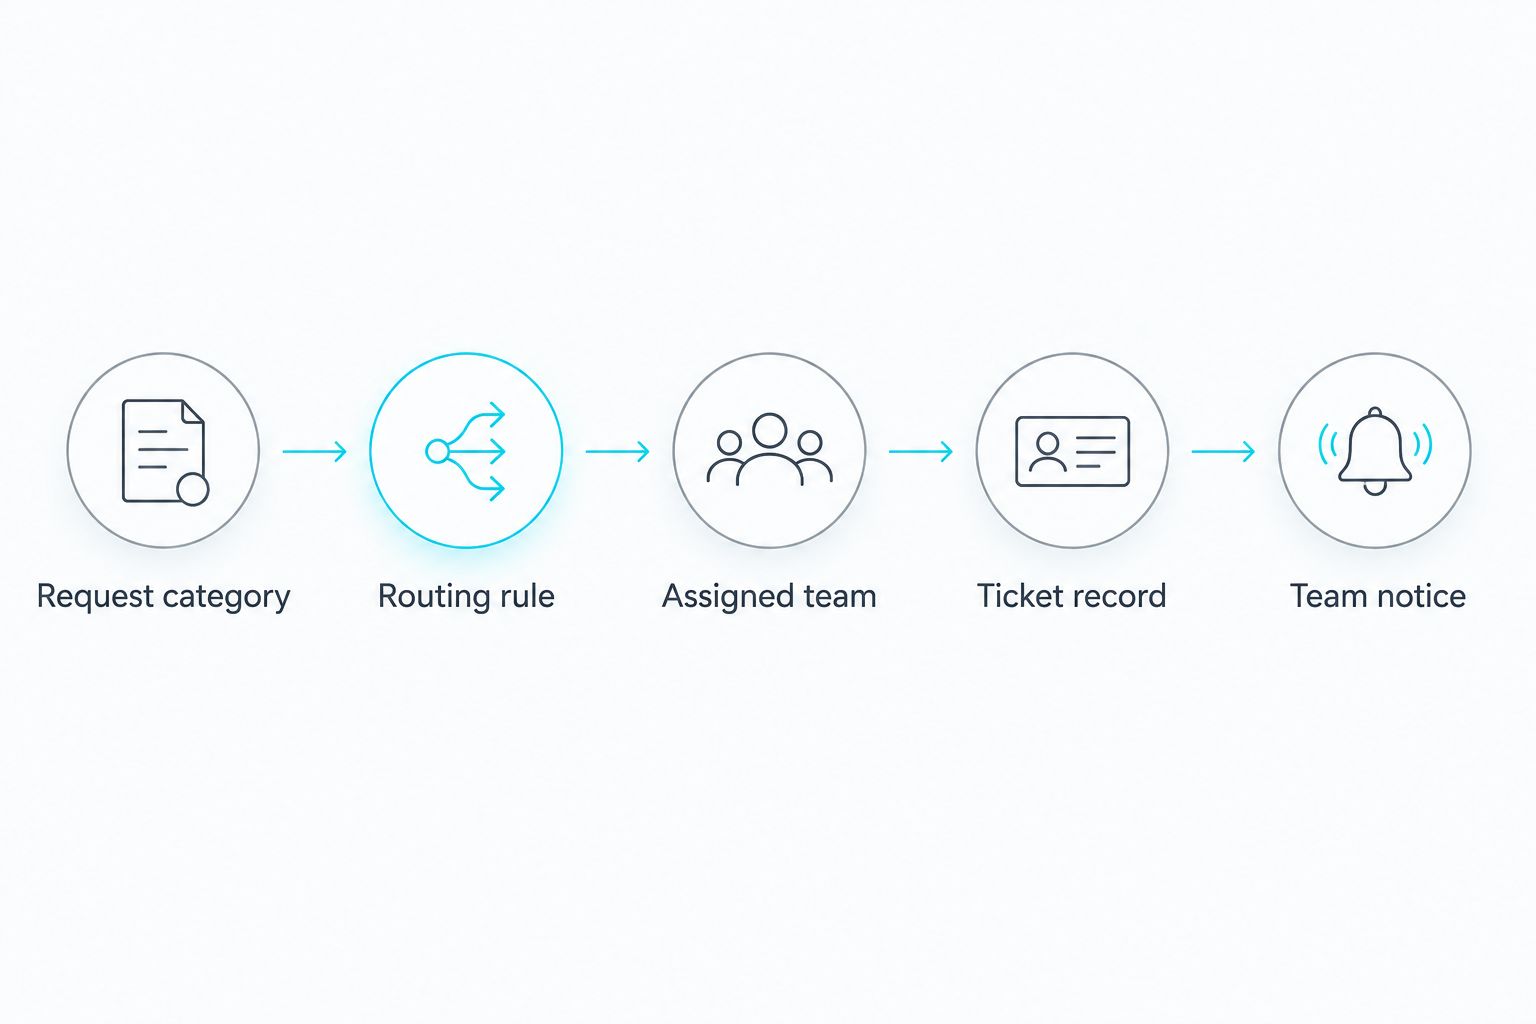
- After Get response details, add Initialize variable. Name the variable AssignedTeam, set Type to String, and give Value the default General support. This creates a destination even when a response does not match a named case.
- Add Switch and put the form’s category answer in On. Add a Security case and an Access case. Leave Default for Other or an unexpected value.
- In the Security case, add Set variable and set AssignedTeam to Security queue. In the Access case, set it to Access queue. In Default, set it to General support. Use your real queue names when you configure the live flow.
- Place the next action after the Switch, not inside a case. Save and test with a response from each category, then inspect AssignedTeam in each run.
Expected result: Every test response has exactly one assigned-team value before ticket creation. The Default case catches an unmatched answer rather than leaving the request without an owner.
The routing labels are not permissions. Sending Security to a named queue does not give that queue access to the SharePoint list or Teams destination. Check those permissions separately. If your security process requires an immediate escalation outside ordinary ticket intake, keep that path explicit on the form.
Create the ticket and send notices
Create the record before sending notifications. That order lets both the requester and the receiving team refer to the same SharePoint item ID, and it avoids announcing a ticket that failed to save.
- After Switch, add the SharePoint action Create item. Select your Site Address and List Name. Map the form’s issue summary to Title, its reply address to RequesterEmail, its category to Category, AssignedTeam to AssignedTeam, and the Forms Response Id to SourceResponseId.
- Set Status to Assigned only after the routing rule has selected an owner. If your team requires someone to verify ownership first, use Needs review instead and treat that as a separate queue.
- Add the Microsoft Teams action Post message in a chat or channel. Select the team and channel authorized to receive intake notices. Include the new SharePoint item’s ID, Title, Category, and AssignedTeam in the message. Do not copy sensitive form details into a channel whose membership is broader than the ticket list’s audience.
- Add the Office 365 Outlook action Send an email (V2). Set To to the form’s reply address. Put the created item’s ID in the subject and state that the request has been recorded and routed. Do not describe the acknowledgment as a resolution or add a response-time promise you cannot enforce.
- Choose Save, then use Test with a fresh response. Open the resulting list item and confirm that its ID, category, assigned team, and status match the Teams notice and acknowledgment.
Expected result: A submitted form produces one ticket record, one notice to the receiving destination, and one acknowledgment to the requester. If Create item fails, later actions that depend on its ID should not produce a misleading ticket reference; verify that behavior in the test run.
For 2026 rollout, test each category and the Default case before sharing the form widely. Use a test account with the same form access a normal requester will have. A successful run by the flow owner alone does not prove that other employees can submit requests.
Put ticket routing under support ownership
Connect the intake flow to an accountable managed IT support process.
Route tickets when a list item changes
A second 2026 workflow fits teams that already create tickets directly in SharePoint: route a new list item when its category is added or corrected. This variant does not need Microsoft Forms, but it needs a guard against repeated notifications when the flow updates its own item.
- Create a separate Automated cloud flow with SharePoint’s When an item is created or modified trigger. Select the ticket list under Site Address and List Name.
- Add a Condition that continues only when Status equals New. Put the routing actions in the If yes branch; leave If no without ticket updates or notices.
- Inside If yes, use Switch on Category and set AssignedTeam with the same Security, Access, and Default rules used for form submissions.
- Add Update item to write AssignedTeam and change Status to Assigned. Supply the item ID and any required list fields from the trigger. Then send the team notice.
- Test by creating a New item and by editing an Assigned item. Confirm that the first event routes the ticket and the later edit does not send another notice.
Expected result: A newly entered SharePoint ticket moves from New to Assigned. That update fires the modified-item trigger again, but the Status condition stops the second run from repeating the assignment and notification. Editing an already assigned ticket does not silently reroute it; define a separate reassignment process if your team needs one.
The two intake options have different trade-offs. Choose the form when requesters need a controlled entry point. Choose direct list entry when an authorized team already maintains the tickets and needs to route its own records.
| Intake option | Best for | Benefit | Limitation |
|---|---|---|---|
| Microsoft Forms submission | Employees submitting routine IT requests | Required questions supply routing inputs | A form is not an urgent-incident channel |
| SharePoint item creation or modification | Authorized staff entering tickets directly | Routes records already in the list | Status checks are necessary to prevent repeat notices |
TeraCloud’s managed IT role is the support ownership around either option, not a substitute for choosing the right intake path. In 2026, the useful test is whether your team can trace a request from submission to the person responsible for acting on it.
Troubleshooting failed routes
The flow starts, but category answers are blank. Confirm that Get response details uses the trigger’s Response Id and the same Form Id. Run a new submission after saving; do not judge the mapping from an older test run created before the field changed.
The ticket lands in General support unexpectedly. Compare the submitted category with the Switch case values. A case that does not match follows Default. Inspect the run’s Switch output, correct the case value, and test that category again.
The SharePoint item fails to save. Check the flow connection’s access to the selected site and list. Then inspect the failed Create item action for a required column or a choice value that does not match the list configuration. Fix the list mapping before retesting the notification actions.
A ticket is created, but nobody receives a notice. Inspect the Teams action in that run and verify both its connection and selected destination. Check channel membership before posting ticket details. The list item is the source of record; do not create another ticket to compensate for a failed message.
A list edit sends the same notice again. In the list-trigger variant, confirm that the Condition checks for New before Update item runs and that the update changes Status to Assigned. Test an edit to an assigned item to verify that the notification branch stays inactive.
Customize your workflow
Once basic routing works, decide what each field is for. Category determines the receiving team; Status shows whether a person must still review the request; SourceResponseId ties a form submission to its ticket. Keep those meanings stable rather than asking one field to represent both urgency and ownership.
If the same Forms response is ever processed more than once, use SourceResponseId to check for an existing ticket before Create item. Do not assume that two successful flow runs mean two separate requests. Add that duplicate check only after the basic flow works, and test it with a repeated response identifier before relying on it.
For 2026 operations, document who changes routing cases when team responsibilities change, who reviews the Default queue, and who investigates failed runs. TeraCloud’s managed IT services are relevant when that ownership needs to sit alongside broader IT support, cybersecurity, and cloud management. Automation stays useful only while its destinations and permissions match the real support team.
FAQ
How do I set up power automate it ticket routing?
Use a request trigger, retrieve the request details, assign a team from a defined category, create a ticket, and notify the team and requester. Test every category and the unmatched default route before publishing.
Can Microsoft Forms create an IT ticket in SharePoint?
Yes. A Power Automate flow can retrieve a Forms response with Get response details and write its answers to a SharePoint list with Create item.
Does zero-touch ticket routing resolve IT incidents?
No. Zero-touch routing assigns and records a request without manual sorting; a qualified person still investigates and resolves the incident.
What happens if a ticket category does not match a routing rule?
Send it to an explicit default queue for review. A Switch action’s Default branch prevents an unmatched category from becoming an unassigned ticket.
How do I stop a SharePoint ticket flow from sending duplicate notices?
Check that Status is New before routing, then change it to Assigned when the ticket is updated. The resulting trigger run should fail that condition and send no second notice.
Should an urgent security incident use the same intake form?
Not as its only reporting path. State the approved urgent-incident contact method on the form and keep immediate escalation separate from routine ticket acknowledgment.
Which intake option is better for employees submitting IT requests?
Microsoft Forms is the better fit when employees need required questions and a controlled submission path. Direct SharePoint entry fits authorized staff who already work in the ticket list.
One last thing
Test the exception before you test the happy path again. Submit a category that falls into Default and confirm that a real team owns the resulting ticket. In 2026, that single check tells you more about whether power automate it ticket routing is dependable than another successful Access request. If you need support ownership beyond the flow itself, define who monitors that default queue with TeraCloud.